How do I set up LPR Printing on Windows Vista?
Printer drivers are required to be installed first, before setting up LPR, make sure the Print Server has an IP address and you are able to ping the Print Server. In this example, the Print Server has been statically assigned an IP Address of 192.168.1.54.
To locate the printer properties click on the Aero (Start) button and then select the Control Panel. Under the Hardware and Sound category select Printer

Step 1:
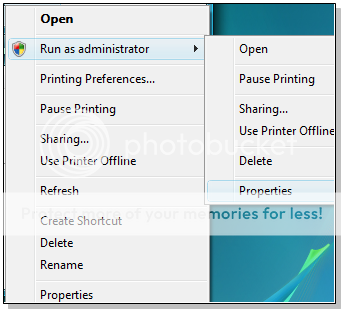
Right click over the printer icon and from the context menu select Run as administrator. You may need to right click the icon once again to view this menu screen. There are two context menus that may appear.

Now select the option Properties.
Step 2:
From the printer properties window select the Ports tab and then click the Add Port... button.

Step 3:
Select the Standard TCP/IP port and now click the New Port... button.

Step 4:
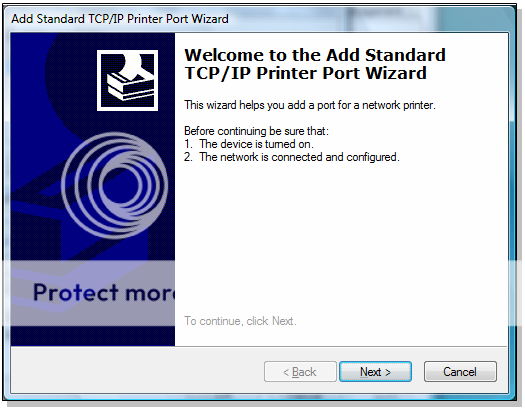
In the Welcome to the Add Standard… click the Next button.
Step 5:
Enter the IP address that was assigned to the local Linksys Print Server in the Printer Name or IP Address field box and then click Next.

Step 6:
Select the Custom radio button and then click on the Settings... button.

Select LPR from the Protocol box and in the LPR Settings you will need to give the port a queue name. e.g. WPS54G and then click OK.

Step 7:
Click Next to continue and then click Finish.

Step 8:
Close the Printer Ports window

Step 9: (Important that you follow this step)
Click the Apply button and then OK.

Step 10:
You should now be able to connect your printer to the WPS54G USB port.

Troubleshooting:
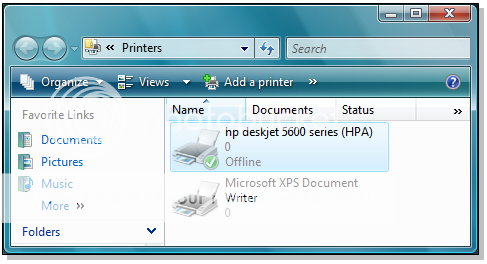
If you are still unable to print and the Printer Icon reads Offline, right click the printer icon and select the option to Use Printer Online. The printer icon will now read Ready like in Step 10.

And its done !!!
Sometimes you'll be unable to print a job and have it end - the print server won't know when to stop, and it'll keep printing the entire job over and over and over...
ReplyDeleteSo check off "LPR Byte Counting Enabled" and that may solve any problems, in case you're seeing this and wondering why you can't get it to work properly.
Thanks for the correction Chris
ReplyDeleteCheers !!!
This also works for some XP installs. I have a Dell laptop with a Vista lic that came with XP Pro preinstalled, and the printer server WPS54G would not work and had these symptoms. Using the LPR setting worked fine. Something must be different in the XP install as many other XP Pro installs work fine with this PS.
ReplyDeleteGreat tutorial it works perfect under vista ultimate thx poster
ReplyDelete