Always upgrade the firmware or any linksys device with the computer connected with an ethernet cable to the Router / Modem / Access Point / Range Expander or any other device.
A firmware upgrade is recommended on the Valet or Linksys E-Series if you are experiencing the following:
- Intermittent or slow performance
- Your Valet or Linksys E-Series freezes unexpectedly
- Your Internet connection frequently gets disconnected
Follow these steps to upgrade the firmware.
Step 1:
Using your preferred Internet browser, navigate to http://homesupport.cisco.com.
Step 2:
Once you’re on http://homesupport.cisco.com, enter the model number of your product, in the Search Support field located on the upper left corner of the page. Click on the arrow icon to continue.

Step 3:
On the next page, click on the Downloads tab under Support Sections.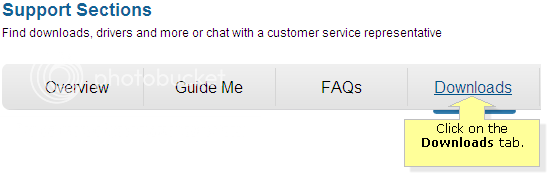
Step 4:
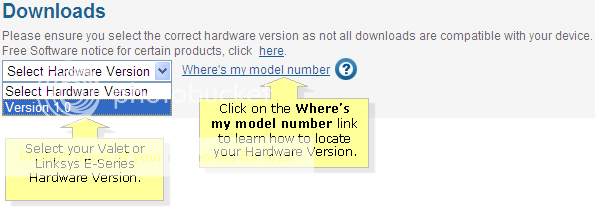
Select your Valet or Linksys E-Series hardware Version from the Select Hardware Version drop down menu.
NOTE: It is important that you select the correct Hardware Version for your Valet or Linksys E-Series product. Click on the Where’s my model number link to learn how to locate your Hardware Version.
Step 5:
After selecting your Hardware Version, click on the Download link under the Firmware section.

Step 6:
A File Download window will now appear. Click on the Save button.

Step 7:
In the Save As window that appears, specify a folder or location to place the file in, then click on the Save button at the bottom right.

Step 8:
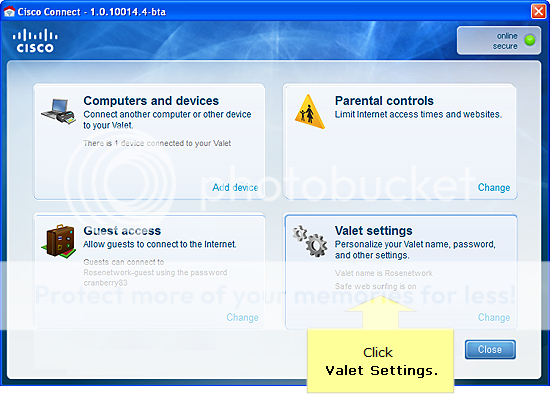
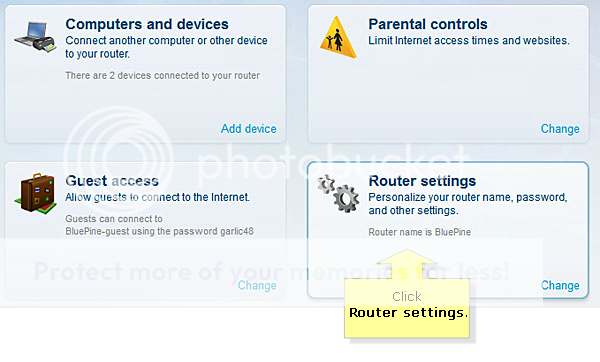
Once you have downloaded the firmware, launch Cisco Connect. Click Valet settings if you’re using a Valet, or Router settings if you’re using a Linksys E-Series.
NOTE: To launch Cisco Connect on a Windows computer, go to Start>All Programs>Cisco Connect.
To launch Cisco Connect on a Mac computer, navigate to the Applications folder in Go, and then start Cisco Connect.
Now you have the firmware so follow the steps below
Step 1:
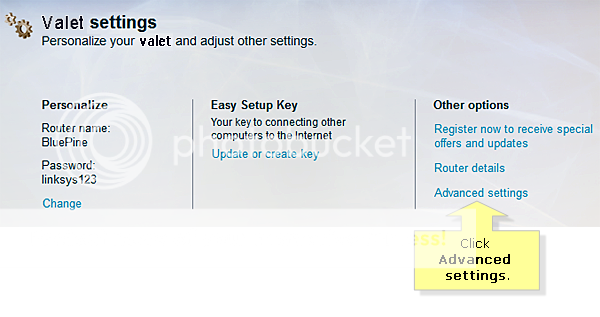
When you see the Router settings or Valet settings screen, click Advanced settings.
Step 2:
At the Advanced settings screen, click Copy password then click OK. It will bring you to the Web-based utility of your Valet or Linksys E-Series.

Step 3:
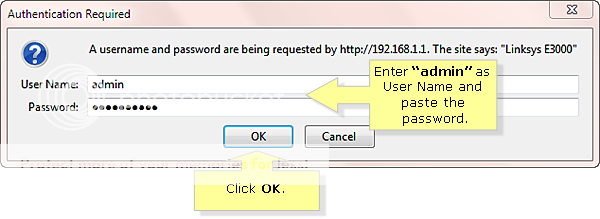
When you are prompted for User Name and Password, enter “admin” as User Name and right-click and select Paste to paste the password you have copied earlier. Then click OK
Step 4:
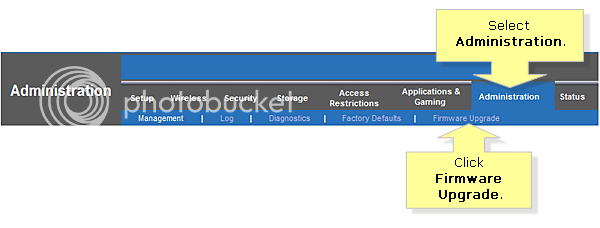
You will now see the Web-based utility. Select Administration and click Firmware Upgrade.
Step 5:
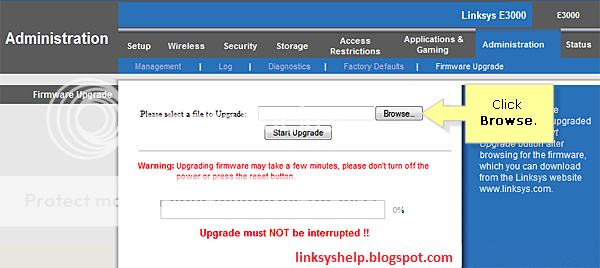
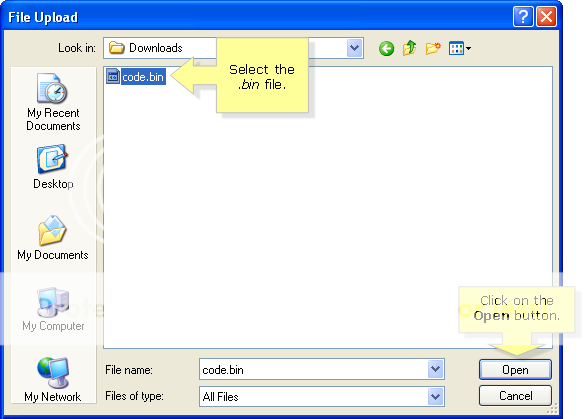
To start firmware upgrade process, click Browse and select the .bin file that you downloaded earlier.
Step 6:
After selecting the .bin file, click on the Open button at the bottom right.
NOTE: The file name may vary based on the product model.
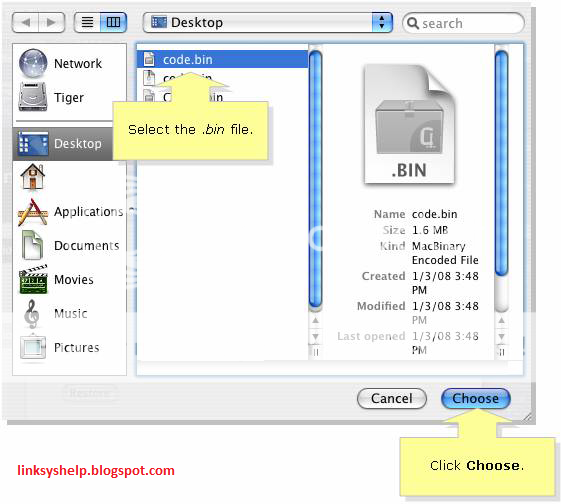
NOTE: If you are using a Mac, your screen should look similar to the screenshot below. Select the .bin file and click on the Choose button.
Step 7:
After selecting the file, click Start Upgrade

Step 8:
Once the upgrade is successful, the following message will appear:

what do you do if the upgrade is unsuccessful?
ReplyDeletethank you so much for this. it helped so much! :)
ReplyDeletecheck if the firmware is proper or call the tech support .. but DO NOT PAY FOR THE SUPPORT. A new site will be launching soon
ReplyDeleteThank you very helpful!
ReplyDeleteWhat downloaded to my mac for my E2000 was a dmg (disk image). When I opened this I got a setup.app file, not a .bin file. When I double clicked the setup.app file, it complained that it only worked with - Mac OS X 10.4.9 or later
ReplyDelete- Mac OS X 10.5.8 or later
- Mac OS X 10.6.1 or later
And I should upgrade. But I'm running Mac OS X 10.7.3. So... what do I do now?